Posted on Leave a comment

Idiot Christmas Light Controller

There are 3 types of people at Christmas time. People that put up:

  • A reasonable amount of Christmas lights
  • No Christmas Lights at all
  • An ungodly horrendous amount of Christmas lights.

I’m the third type.

I decided the world needed a box with 8 outlets that could be controlled from a master in my house. I wanted the ability to dim the lights, blink the lights, control the lights with DMX down the road ( never did that one ), but ultimately decided all I really needed was to blink them in the most chaotic way possible. Random was good as long as half the lights were on at any given time. Completely random blinking meant that half the lights were off about half the time. About 25% of the time only 25% of the lights were on. I didn’t like that.

Oh, and I made 8 boxes. So that’s 64 outlets total.

Too keep the current consumption reasonable, I decided that not only was 4 outlets the minimum number outlets, it’s the perfect amount of lights that should be on. It’s totally random which 4 outlets are on for each box, but it is only four.

Running power all over the yard was made simpler by allowing 110VAC input and output on every box.

This project consisted of:

  • A TRIAC power board x8
  • A Receiver board x8
  • 3D printed customer enclosure x8
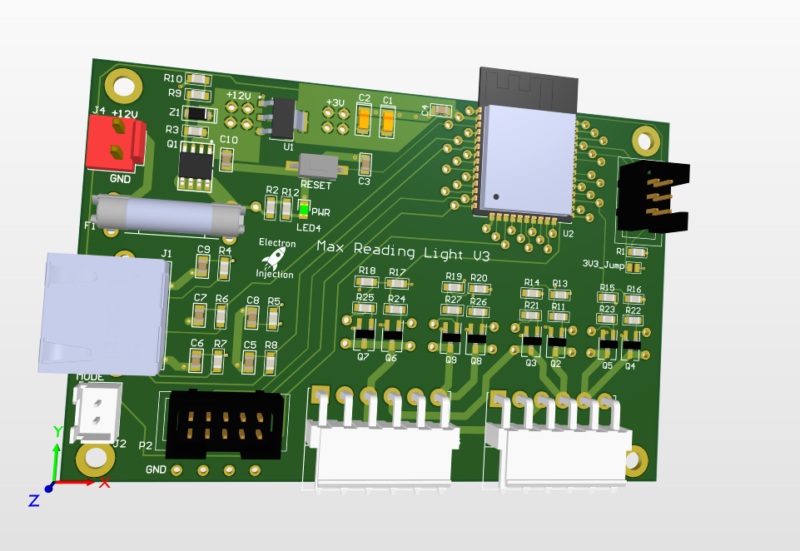
  • A control board

ESP32

My weapon of choice whenever wireless or wi-fi is being used is the ESP32. I have many of the cheapo Ali Express Dev boards, but I spun my own boards for this one. Wireless range was a concern, but the ESP-NOW library allowed me to build up a mesh network so that each ESP32 board could talk to the other one. The library does all the heavy lifting, but range has been no problem at all even though my control board is down in a basement.

TRIAC Board

TRIAC Board

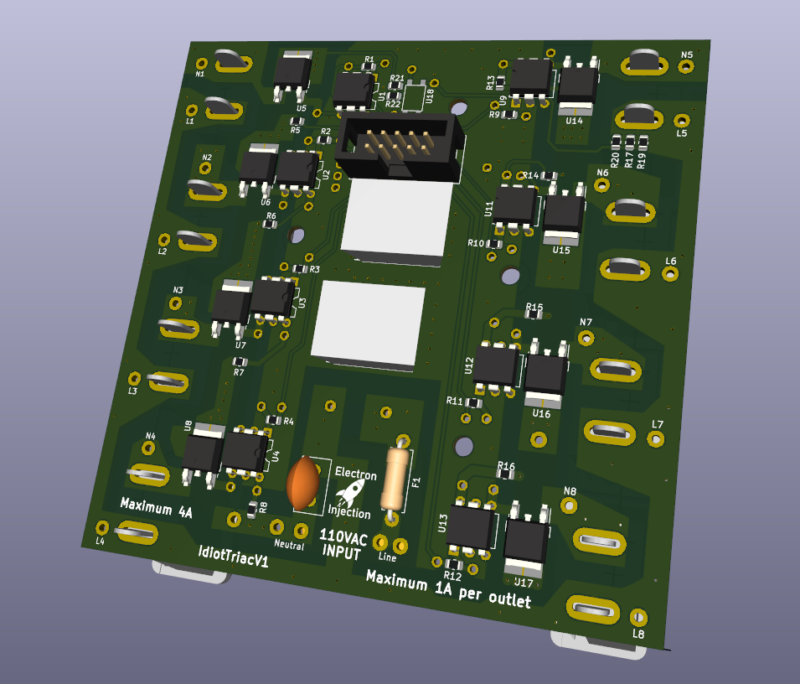
I guess you can call this a mixed signal board. It’s not EXACTLY a digital signal, but there is some 110VAC power here….at least by my standards. Each outlet is rated for 1A (20 strands of lights), but I’ve never came close to that number. The board itself is rated at 4A total, but I need to check my old notes to see how I came up with that.

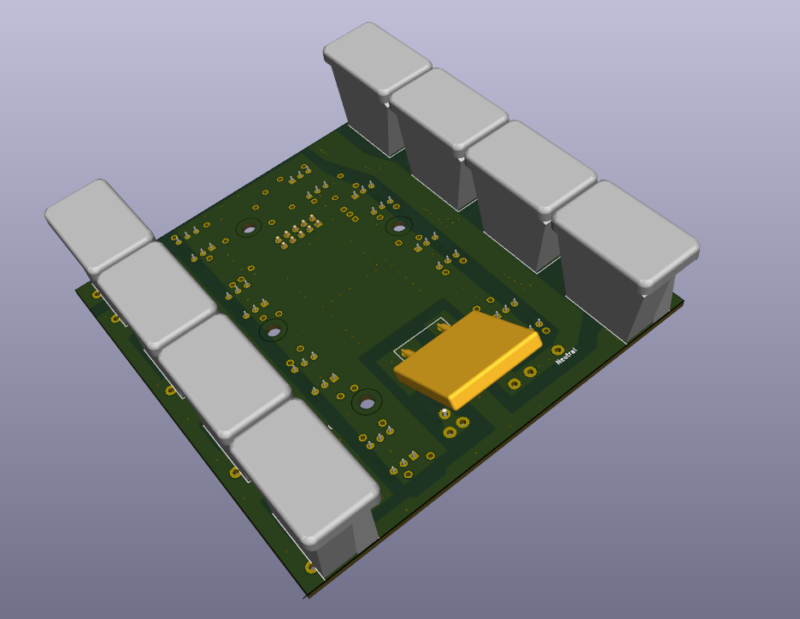
The bottom pick is missing the slots where the Christmas Lights plug into. It makes much more sense with that correction. I took a chance on this approach. This 3D model does not show the enclosure the outlets must slip through before soldering. Luckily, this approach has been bulletproof for 5 years and allowed me to avoid wires. Life doesn’t get much better than avoiding wires.

Receiver Board

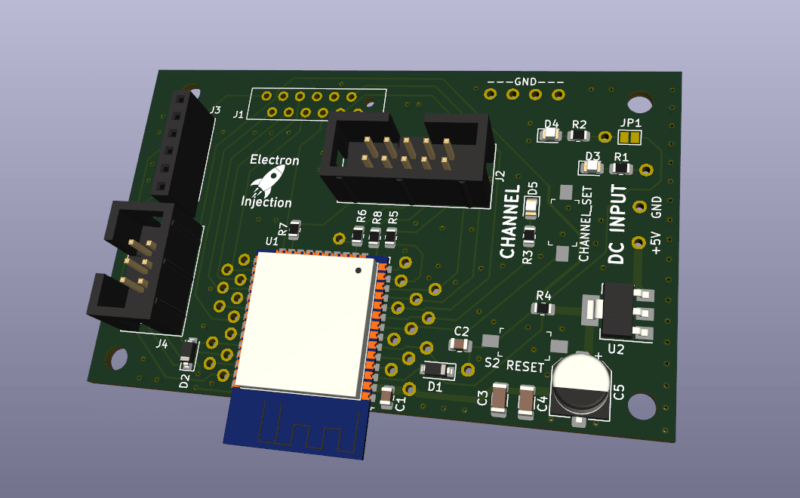
This receiver board is super simple. +5V input. The ESP32 talks to the Sender via ESP-NOW (more or less wi-fi, kinda). It talks to the TRIAC board via the IDC connector. I originally designed this using a press fit connector instead of the IDC connector. Lesson learned. See “Mistake” below.

Mistakes

Press Fit Connectors Without Serious Jig = Bla!

I experimented with a ribbon connector to mate the TRIAC board with the receiver board within each box. I found some new connectors where you just smash the ribbon with these jaws-of-life teeth. These are probably great if you have a jig to correctly smash them. (I later learned all about press fit connectors at work.) My “jig” was completely inadequate and some of the connections were bad. I lost one or two outlets on each box right away and had to redo the press fit process over and over to get it right. Even then, the connection was unrliable.

I could have used standard 2×5 IDC 2.54mm cables. I always have dozens on hand. I guess my need to experiment bit me that time.

The press fit style connector can not be taken off and this made troubleshooting difficult at times. Lesson learned.

If I redesigned this, I’d use a board-to-board connector…probably just standard 2.54mm headers.

Strengths

PETG Works Great For Enclosures!

PETG enclosures have been very durable. I left 2 of these boxes outside. They are covered to keep the rain out, but nothing else. In a bad storm, they’ll get wet. They’ve been outside since October 2021. They still work very well.

Modern LED Christmas Lights Use Little Power

I’m not sure I believe it, but a 25ft strand of the LED Christmas Lights I purchased only consumes 50mA….and they are really too bright. I’ve considered knocking the brightness down in the code by shortening the TRIAC “duty cycle”. I don’t that’s the term when dealing with TRIACS but this project was 5 years ago and it is the term for PWM and the concept is mostly the same.

Enclosure Ventilation Is Good

Everyone says that water and electronics don’t mix. That’s super true if you’ve got an electrolyte in your water. What they don’t tell you is humidity is everywhere ( not a shock ) and no matter how well you seal up your enclosure, water vapor is getting in. In December in Missouri the temperatures will get down to 0F sometimes and as high as 70F with a typical temperature at any given time being around 32F. That’s a recipe for condensation.

So even if you think you completely sealed your enclosure, water vapor is getting in and that moisture is going to experience condensation. Then you have water….not jus t the vapor in your enclosure. If you think you sealed the water out, you’ve now just sealed the water in. OUCH! That part isn’t intuitive.

I took ventilation seriously and it’s paid off tremendously.

Posted on Leave a comment

Reading Light Bar

Requirements:

  • Diffused RGBW light that is great for reading that can be mounted to the wall
  • Requires different modes of operation. a) Crazy light show b) Adjustable R G B and W light via faders
    • Reading mode should start out at the set brightness and then fade incrementally for an hour until eventually shutting off. You shouldn’t notice the light is getting dimmer.

This was a basic project. The ESP32 is overkill for this, but I had it on hand. For linear faders that are normally used on a mixing console create voltage dividers that are read by the ADC on the ESP32. The light is dimmed with standard PWM and MOSFETs. Fun artifact. My son wanted to know why his ceiling fan was spinning backwards. He learned all about aliasing! Fun stuff. The PWM frequency I chose is just a hair faster than the rotation of the fan. Persistence of vision says humans can see light when it blinks fast enough, but tell that to the fan. It knows!

Lessons Learned

I don’t know what I was thinking! I used a linear regulator to step down from 12V to 3.3V. That’ll never happen again. Dissipating 8V+ when an ESP32 is pulling hefty power for a modern microcontroller is a bad, bad idea. I should have used a switching regulator. People worry about the noise. Fair enough. I worry about melting!

Those hefty VM3.96mm connectors at ref des: J5 and J3 are strong. They are also a bit too snug. They are meant to be plugged in and stayed plugged in. That’s good. The problem is if you ever want to take the connector off. They are kinda terrible. Granted, I’m sure I got these from Ali Express for $0.00001. Maybe you get what you pay for sometimes.

This was a fun little project. The greatest challenge was getting the clearance right on the 3D printed “tracks” for the LEDs.

As always I always struggle with wiring and connectors. The NAME OF CONNECTOR GOES HER wasn’t nearly as handy for plugging and unplugging as I had hoped. I used an RJ45 connector for the ESP32 to talk to the fader. That worked well. The lesson is a consumer-approved connector should always be used for “consumer approved tasks” whatever that means.

Posted on Leave a comment

Smooth Fading LEDs With STM32 Blue Pill on Arduino Platform

The smooth fading of LEDs is possible, but it’s best to have 16 bits to work with and ditch the linear world.

// My code
dutyCycle = pow(1.03, time_increment);

// Math equivalent
y = 1.03^x

Above is the most interesting piece of code today. dutyCycle for this code is a number from 0 – 65535. (16-bit resolution is (2^16 – 1 = 65535).

I have the time_increment set to 10ms. So, basically, we are going to increase the dutycyle by 3% every 10ms. You’ll see below that I settled on 375 steps with each time taking 10ms. By using a time_increment that is set to increase every X milliseconds, it’s easy to control the speed of the fading.

WHY 1.03?

To get the 1.03 value, I worked backward and shot for a ballpark rating of 400 individual steps of brightness. Why? No idea.
After some playing, I figured out that 1.03^375 = 65156. 375 steps works for me. The big rule is we can’t exceed 65535 or the microcontroller will rollover.
To put it another way, 65535 + 1 = 0 in digital land. It’s no different than any other cyclical process. In military time, if you add another minute to 23:59, you get 00:00.
For our purposes, we didn’t want rollover. We want to smoothly fade the LED up to it’s maximum brightness and then back down.

WHY NOT LINEAR?

Much like our ears, eyes have evolved to handle an atrocious level of dynamic range. Such systems play in the world of logs and exponentials (same thing after you flip the graph axis around). It’s one of those scientific marvels that we can make sense of a duty cycle of 65535 and still tell the difference between 500 and 600. In a linear system, we’d have to pick one extreme or the other.

MAKE IT BETTER

It turned out that the dutyCycle code above spent a ton of time in the bottom region. After 50 increments of time, for example, the duty cycle would be 4  (1.03^50 = approx 4). That’s “off” in terms of LED brightness to my eyes. There’s a solution.

Remember that 1.03^375 = 65156. Technically, this wastes a bit of our headroom. We have 65535 to work with and our problem is we are spending too much time down around 0. The lucky fix is to use an offset much like you may have learned (and forgotten) in Alegebra class.

y = mx + b

This is a linear function, but the idea of “b” is the same.  “b” lets us shift our function up our down. We want to shift the whole thing up.   To get our “b” I took 65535 – 65156 to get 379. Let’s just say 375 to be conservative.

// New Code
dutyCycle = pow(1.03, time_increment) + 375;

// Math equivalent
y = 1.03^x + 375.

Now the LEDs do what they are supposed to.  There is not excessive time spent with the LEDs “off”.    So, at time = 0, we end up with a duty cycle of 376. (1 + 375). 376/65535 * 100 = 0.5% actual duty cycle. In reality, this is a brightness of zero. Solved!


#include <Arduino.h>

#define PWM1_pin PA8
#define PWM2_pin PA9
#define PWM3_pin PA10

#define INCREMENTER 100

void CycleA(int pin, int pwm_limit)
{
	int run = 1;
    long timeA = 0;
    int countUp = 1;
    int dutyCycle = 1;
    int time_increment = 0;
    

  while (run == 1)
  {
     
    long currentTime = millis();


    if (pin == 1)
    {
      analogWrite(PWM1_pin, dutyCycle);
    }
    if (pin == 2)
    {
      analogWrite(PWM2_pin, dutyCycle);
    }
        if (pin == 3)
    {
      analogWrite(PWM3_pin, dutyCycle);
    }

    if (currentTime - timeA > 10)
    {
      dutyCycle = pow(1.03, time_increment);
      timeA = currentTime;

      if (dutyCycle > pwm_limit)
      {
        delay(2750);
        //dutyCycle = 1;
        //time_increment = 0;
        countUp = 0;
      }

      if (dutyCycle < 10 && countUp == 0)
      {
        countUp = 1;
        run = 0;
      }

      if (countUp == 1)
      {
        time_increment++;
      }
      else
      {
        time_increment--;
      }
    }
  }
}

void setup()
{

// All PWM pins need to be set as output
// Note:  I've seen multiple examples in which the PWM pins were set to "PWM" instead of "OUTPUT".  I have no explanation for that other than maybe they are using 
// the other guy's STM32-to-Arduino library.
  pinMode(PWM1_pin, OUTPUT);
  pinMode(PWM2_pin, OUTPUT);
  pinMode(PWM3_pin, OUTPUT);
  
  // Change the analogWrite function to operate at 16-bit.  It maxes out at 65535 instead of the 255 of 8-bit.
  analogWriteResolution(16);

}

void loop()
{
 // CycleA(  pin_number,  duty_cycle_limit).
 // This function allows selecting a pin number and sets the duty cycle limit on a scale of 0-65535.
 //  You'll see below that the 10000 for LED Color #1 is there because this was an LED strip that was exceedingly bright.
 //  Basically, the duty_cycle_limit is a brightness limiter.
 
 // I didn't take the time to pass the pin define (PA8, PA9, and PA10) through a function.
 
 // Run LED Sequence for LED Color #1
  CycleA(1, 10000);
  
  // Run LED Sequence for LED Color #2
  CycleA(2, 65000);
  
  // Red LED Sequence for LED Color #3.
  CycleA(3, 65000);
}